TASMO for Simulink
This example demonstrates how to generate test cases from MATLAB/Simulink models using TASMO. Open the file Help|Examples|07 Test Case Generation|01 TASMO for Simulink. Select Execution|Platform Configuration to open the Platform Configuration dialog. All settings are already configured.

MATLAB/Simulink Platform configuration for TASMO
In the Platform Configuration dialog, select the MATLAB version installed on your computer from the MATLAB version drop-down menu. If you select another MATLAB version, you need to generate a new test frame by clicking the Generate button, see Figure "MATLAB/Simulink Platform configuration for TASMO". Then, click the TASMO button. In the dialog that opens, check the preconditions.
In the Model Input / Test Data Specification dialog, you can set the test data specification.
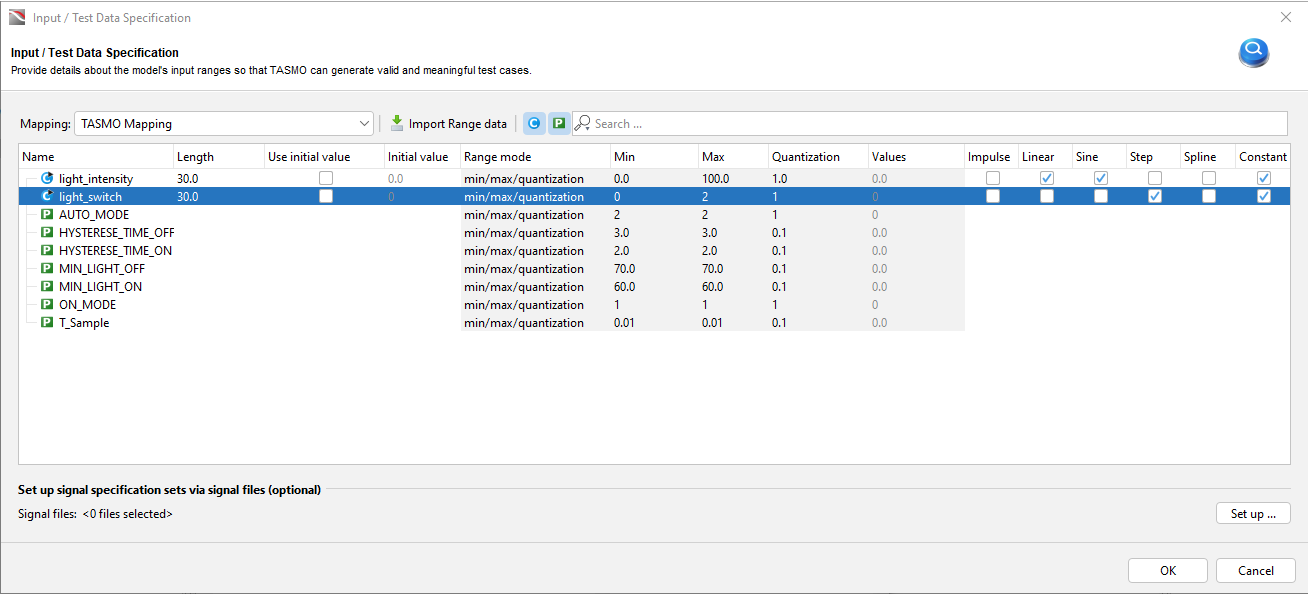
light_intensity and light_switch are different, see Figure "TASMO model input".The channel light_switch has only three states: OFF (0), ON (1), and AUTO (2), therefore the maximum is set to 2 instead of 100. The quantization has been set to 1 instead of the default 0.1. These settings are already saved in a mapping. For the channel light_switch the Step checkbox is selected as Characteristics. For light_intensity the Linear and Sine checkboxes are selected.
In the Select Coverage Criteria / Goals dialog, select the coverage criteria: decision criteria, condition coverage, or both; or select the coverage goals individually.

Select coverage criteria / goals
In the Test Data Generation dialog, the selected coverage goals are listed for each part of the model. In case of wrong settings you can go back and change them.

TASMO test data generation
Click Generate to start the test data generation. In the upper right section, you can see how many test cases have already been created.
Select a variants folder or a test cases folder in the Project view. Click Create step lists in the Test Data Generation dialog.
Check the generated step lists and the comment lines, make changes if necessary. Then execute the test cases.
Related topics